
CASIO Pomrie Stamp Maker
Remember my previous post on the CASIO Pomrie Rubber Stamp Maker? I recently got my hands on a set to try on!!
The CASIO Pomrie is a thermal printer that allows you to customize your own rubber stamps by printing out your desired design on the rubber provided! Which means you can create any type and any kind of rubber stamps of your own from home!!
Say good bye to paying tens and hundreds to get yourself a customised rubber stamp! You can now grab yourself a CASIO Pomrie and make from home! /Woohooooooo!!

Of course I was super stoked to try it out. I like to design and DIY stuff, so being able to design my own rubber stamps makes me really happy!

Best part? It's Mac compatible!!!!!! I was so worried my Macbook couldn't run the program. But thank goddess, it works on Mac too!!
Tell you a secret. I was so excited to try it out, I totally forgot about photo taking after taking the first few shots... So I guess you guys have to watch the video tutorial once I'm done editing it, :P

Here are 4 different sizes of Stamp Kits!

It comes with the thermal pad, where you'll have your designs on. And the wooden stamp holder!

And the sheet holder sets.

The sheet can be detach from the holder itself! So you can get this refill and switch with other wooden stamp holders for the stamps!


Detach!

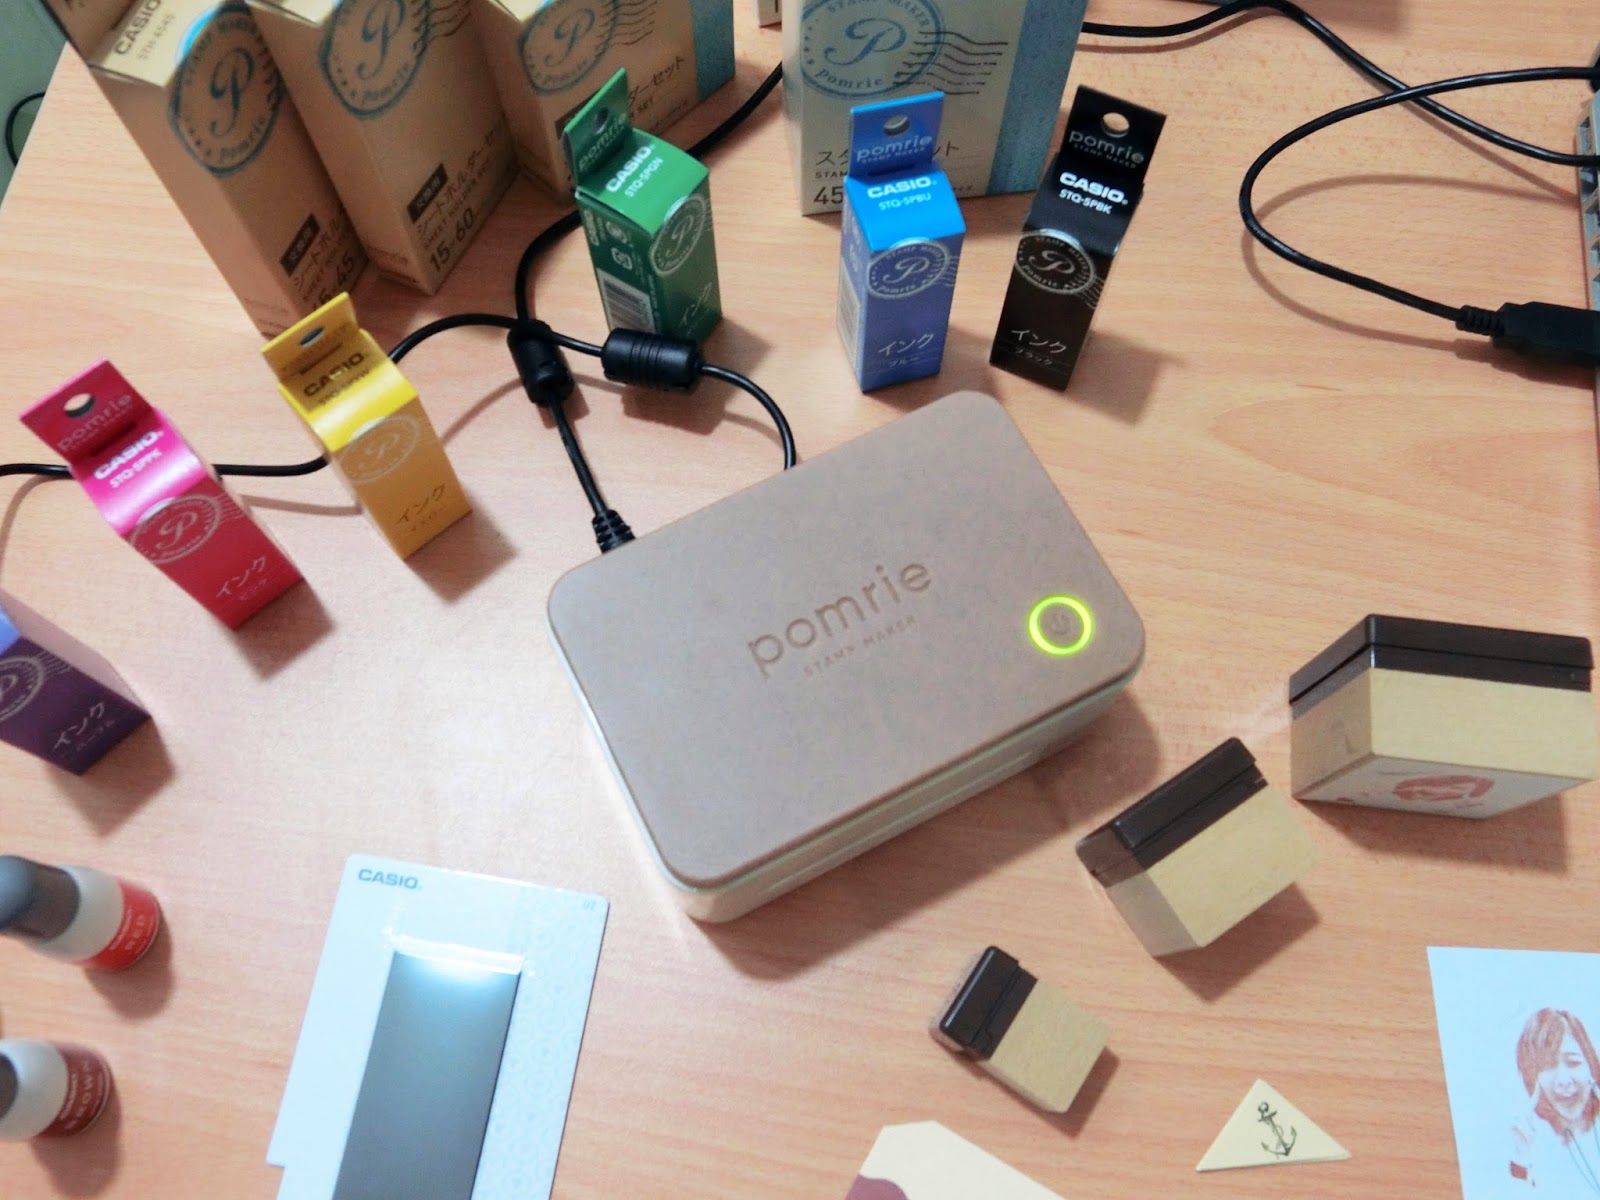
Different colour of inks for your stamps!!
I know right, your usual stamps only has that 3 usual colour pad: Black, Red, Blue. The one you use to stamp your thumbprint, HAHAHHAHA.
Isn't Pomrie awesome?!?!?! They have like 1, 2, 3, 4, 5......... 8 colors?!?!?! There's even brown too!

I have to say, the Brown is one of my few favourite. Hehehehehe.
The CASIO Pomrie comes with the software for designing, and printing. You will have to use the software to locate the Pomrie printer in order to print the design! Meaning, you cannot use any other designing programs(Photoshop, Illustrator, Paint) to have your design printed. But alternately, you can always whip up your design through those program first, then save it as .jpg, and import into CASIO Pomrie Stamp Maker Software!
The Pomrie is pretty flexible in that sense, so no worries!
Look at that pretty pretty interface!!! And it is really user friendly! Super easy to use!
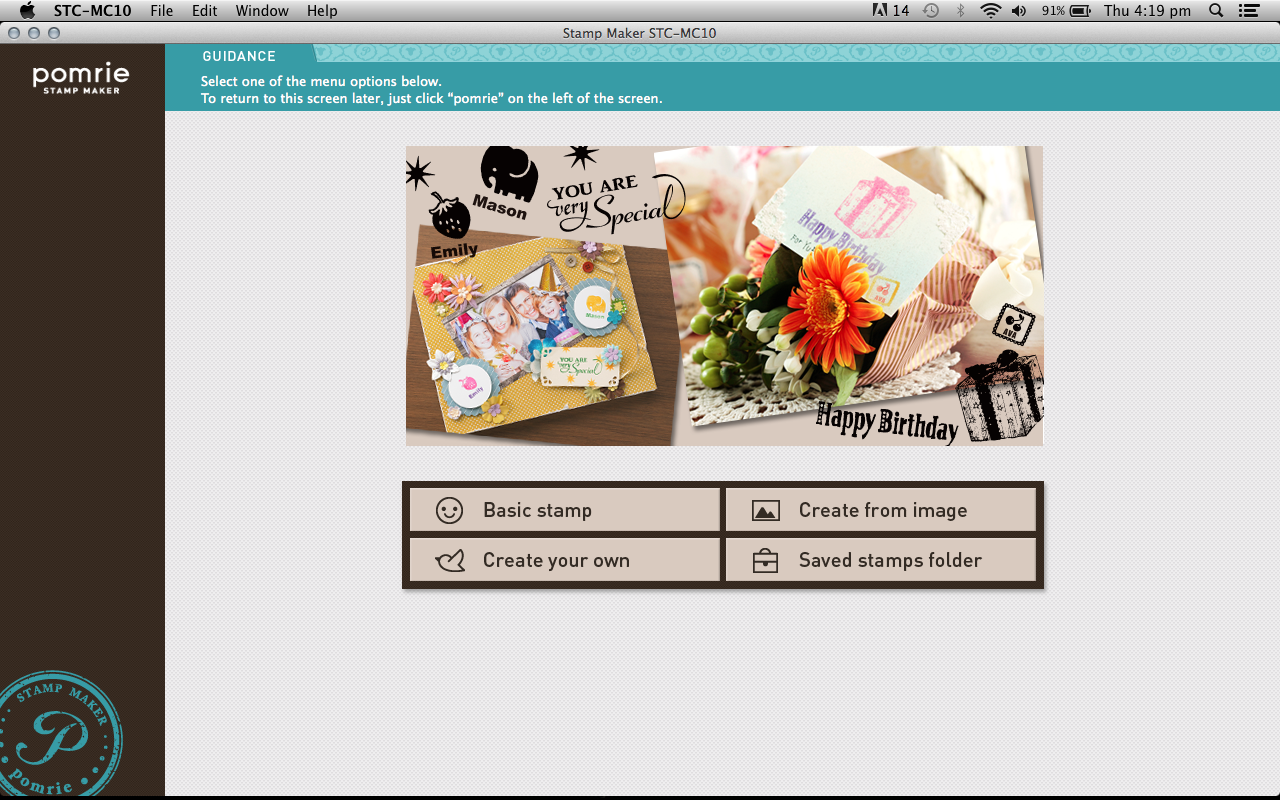
Chose from the 4 options to get started!
1: Basic Stamp
Basic Stamps consist of their stock images! You can print from the images they have if you have no idea what to print!
2: Create from Image
You can chose your desired photo under this option, and have your photos printed!
3: Create your own
Or, you can create your own! From the images they have and the frames they provide, you can mix and match your own design! So rest assure, you will not have the same stamp as any other people!
4: Saved stamp folder
Saved stamp folder is like a history folder. It saves your designs and keeps them inside this folder! By any chance you want to reprint any stamps you already have, you can always look back into this folder to look for it!
For me, I chose to create from image! So here it is!
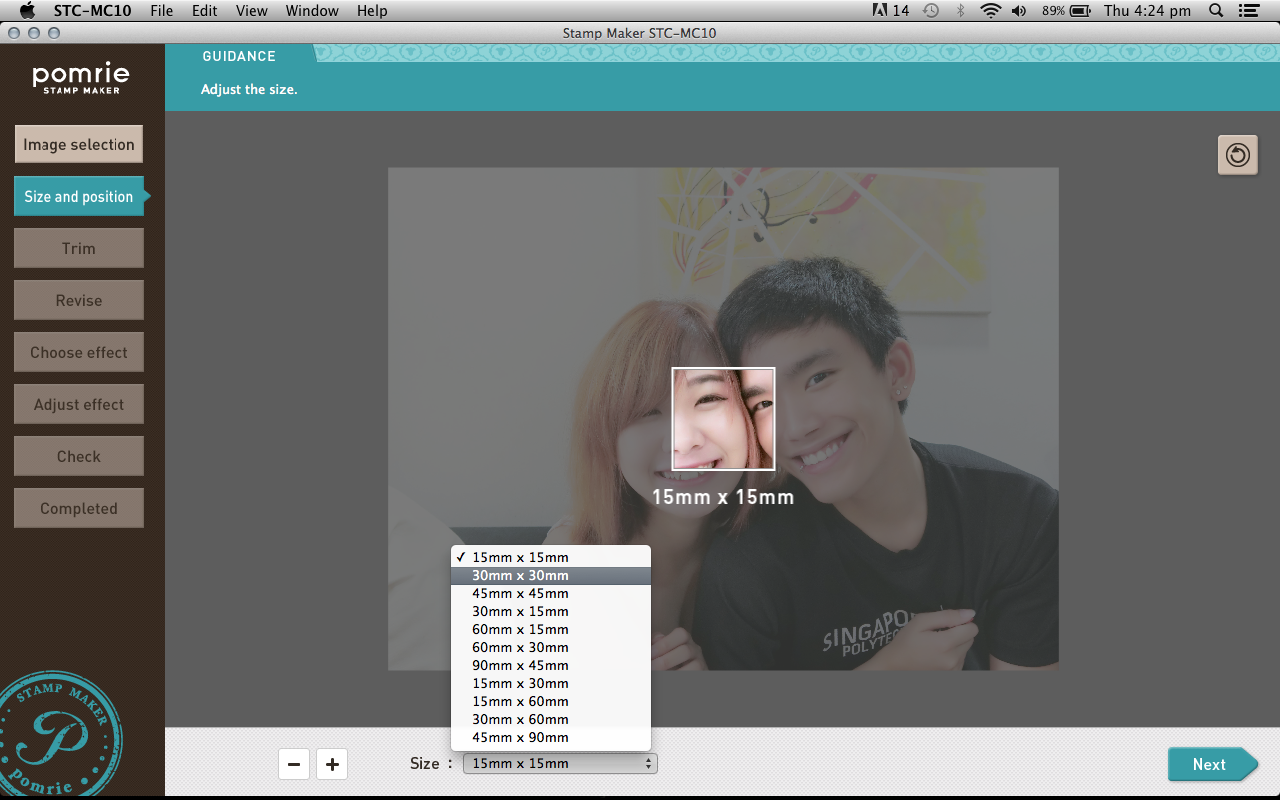
After you've chose your image, you will need to chose the size of the stamp you will be using.
15mm X 15mm is basically a thumb-size stamp, hahaha. It's too small to fit both me and Ryan's faces in. XD
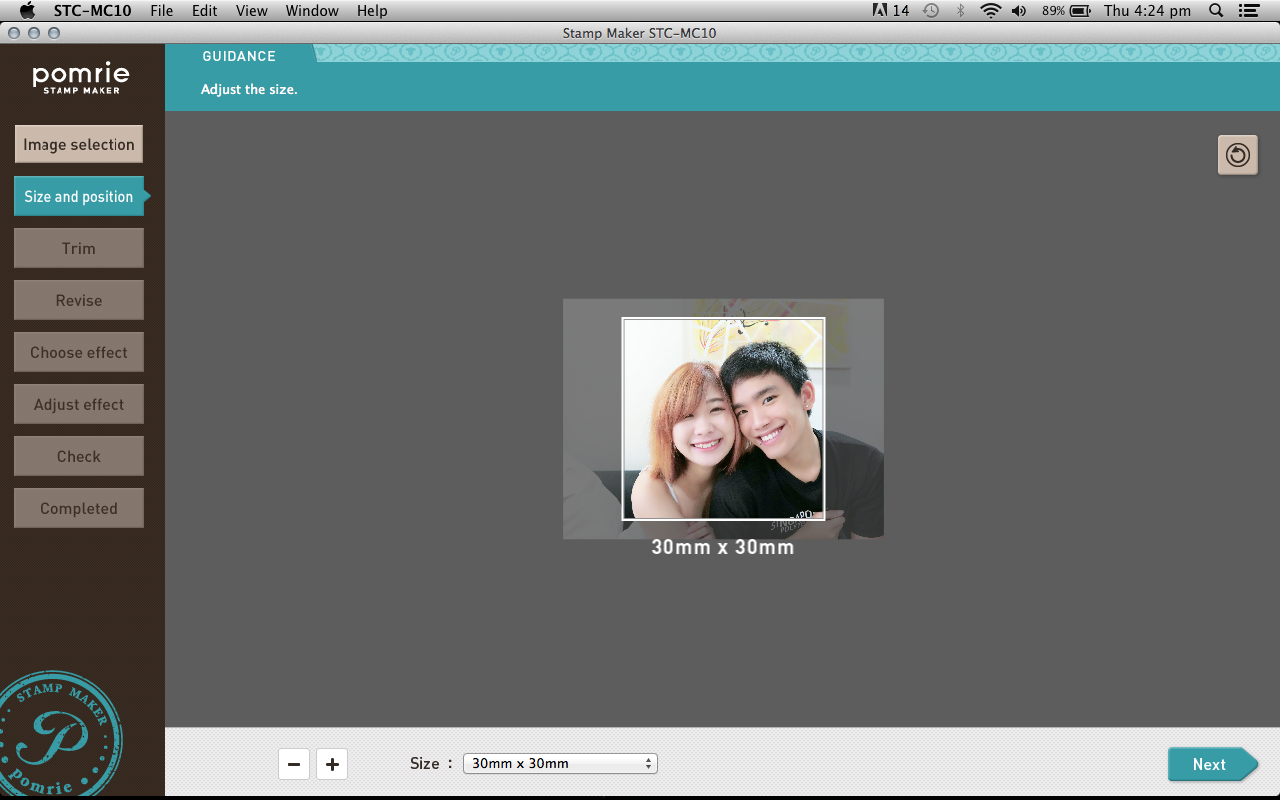
So I got the 30mm X 30mm! Don't forget to resize your image to fit! Otherwise your image will kena crop!
You can resize by clicking the "+, -" signs beside the drop down list!
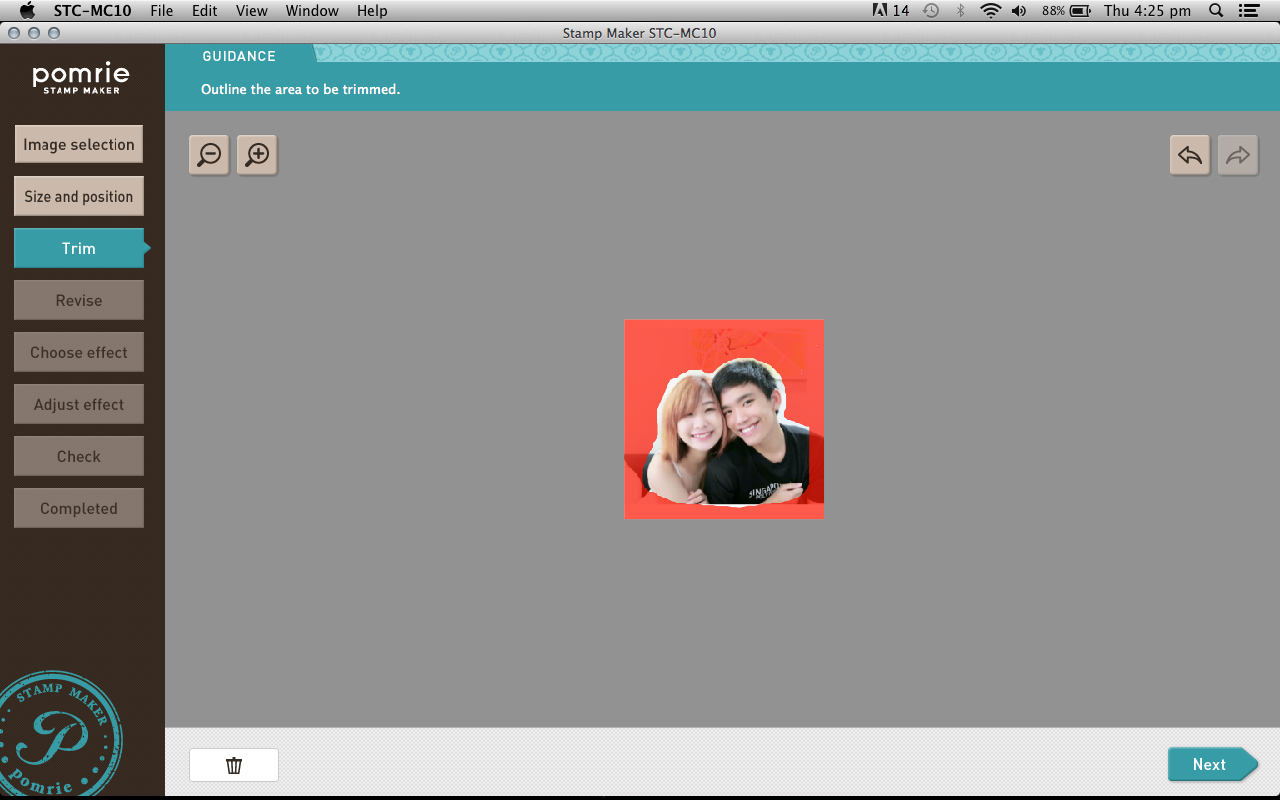
Next, highlight the area that you don't need.
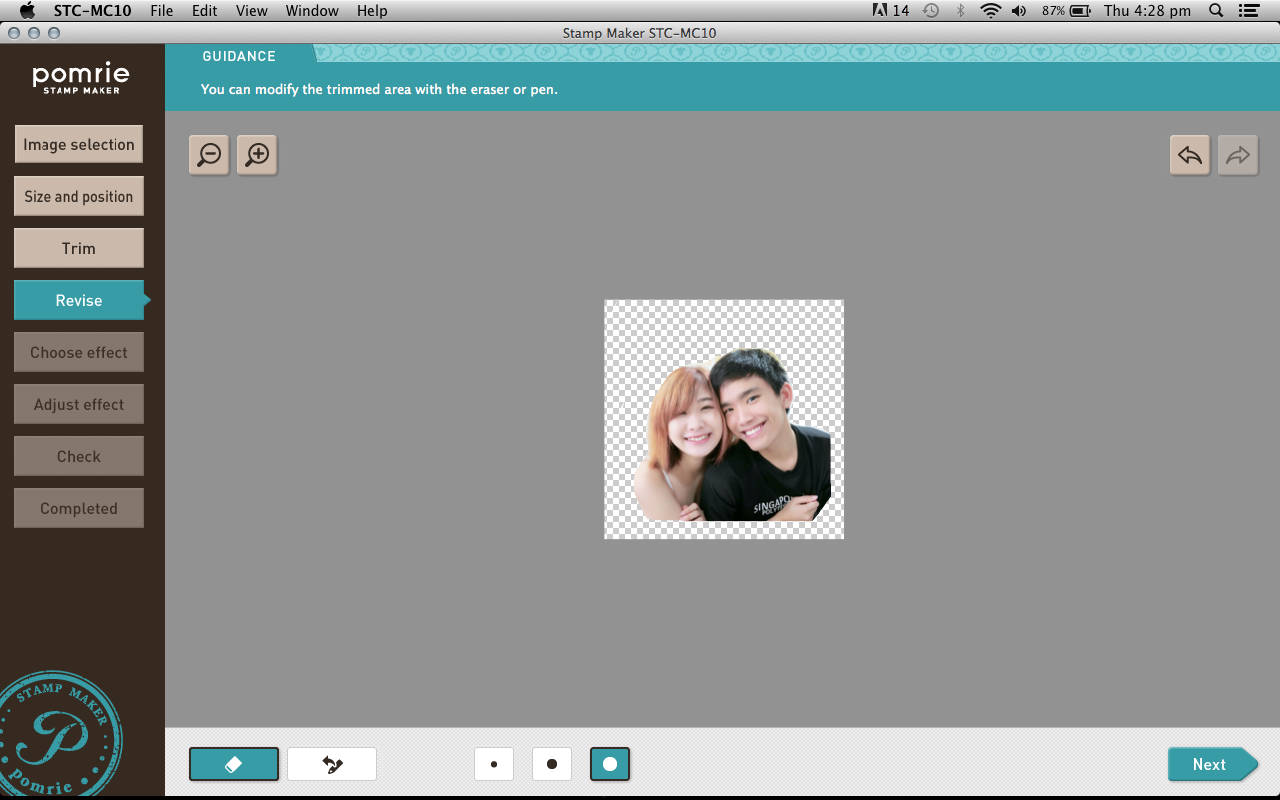
It will then remove your selected area and bring you to the "Revise" page!
Over here, you can do some clean up and remove any remaining excess areas.
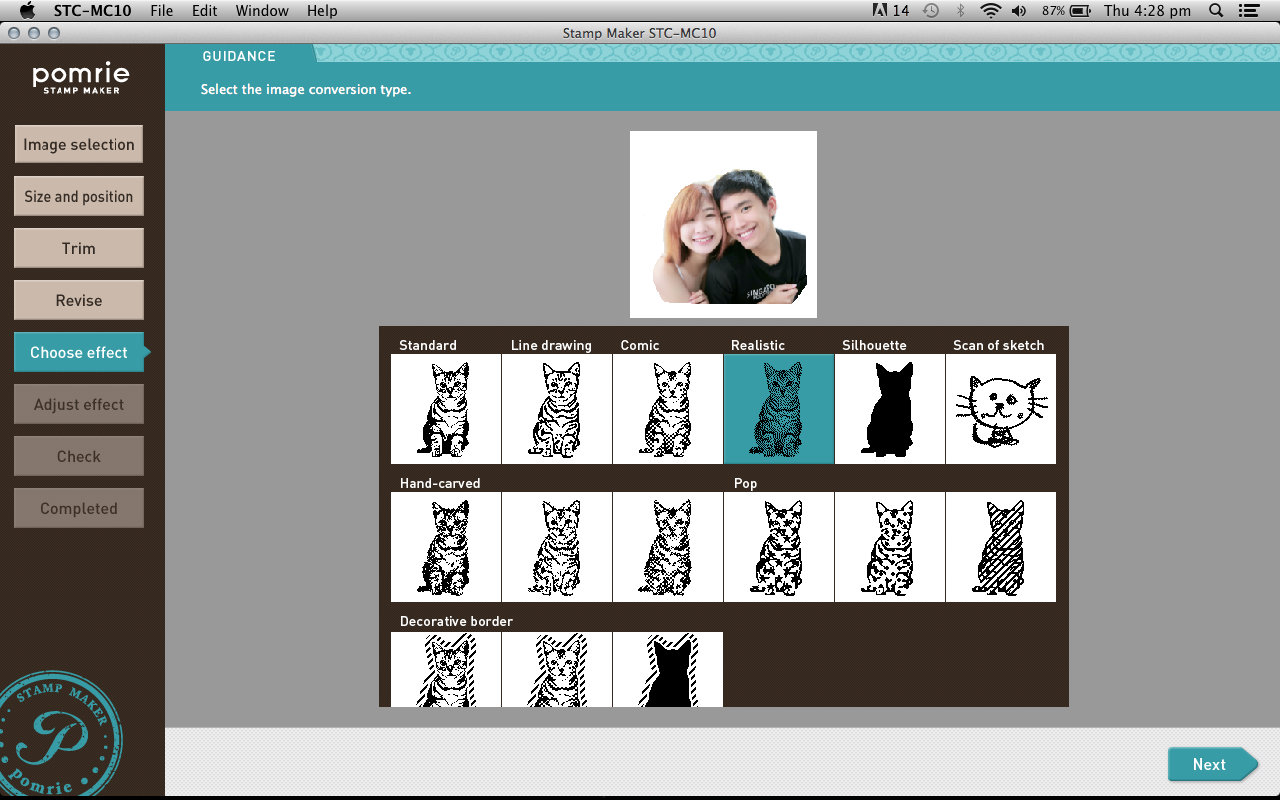
Once you've confirmed the design, you can move on to choosing the effects! They have so many effects I'm totally spoilt for choice!
I like the "Realistic" effect because it looks the most realistic. (Hmm... You don't say?)
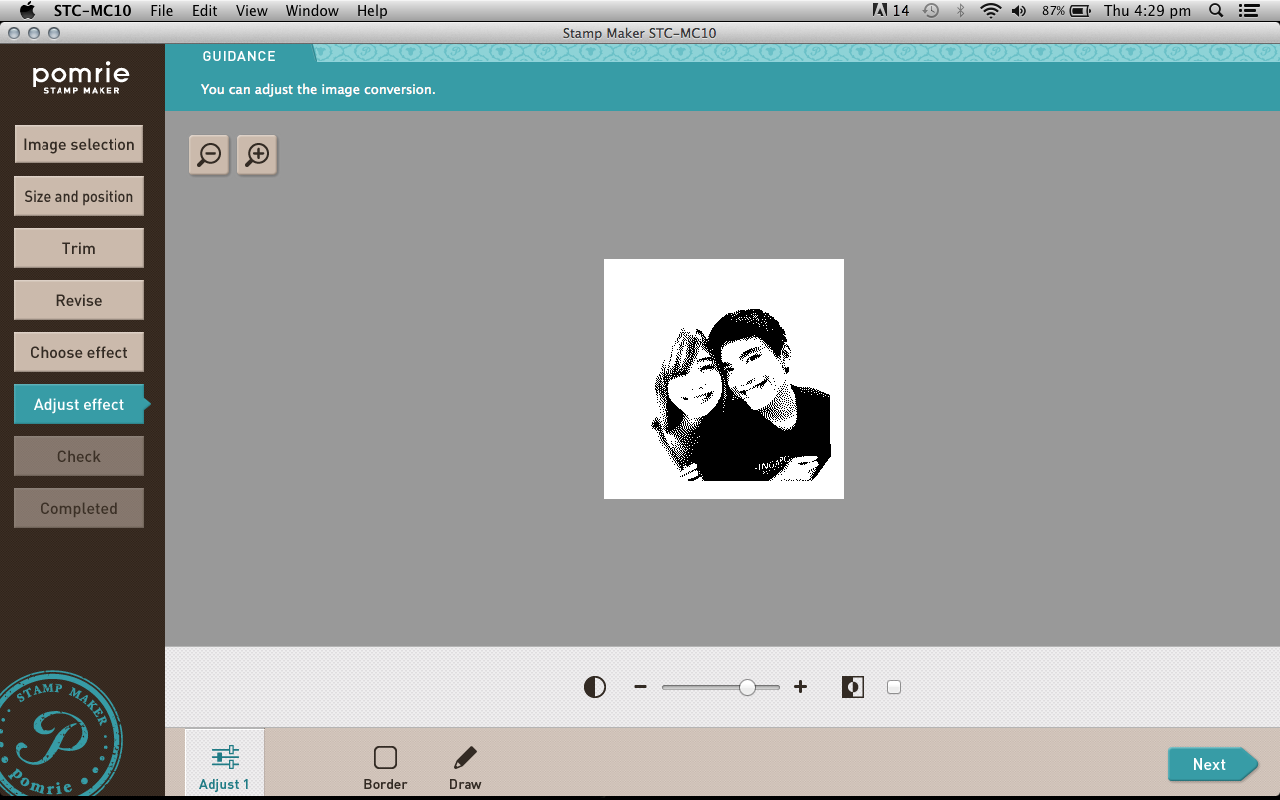
Then you'll just need to adjust the levels of your effects and borders if you want to!
Oh, oh, don't worry if you don't like the effect you chose. You can always click the side bar to go back the step you want to.
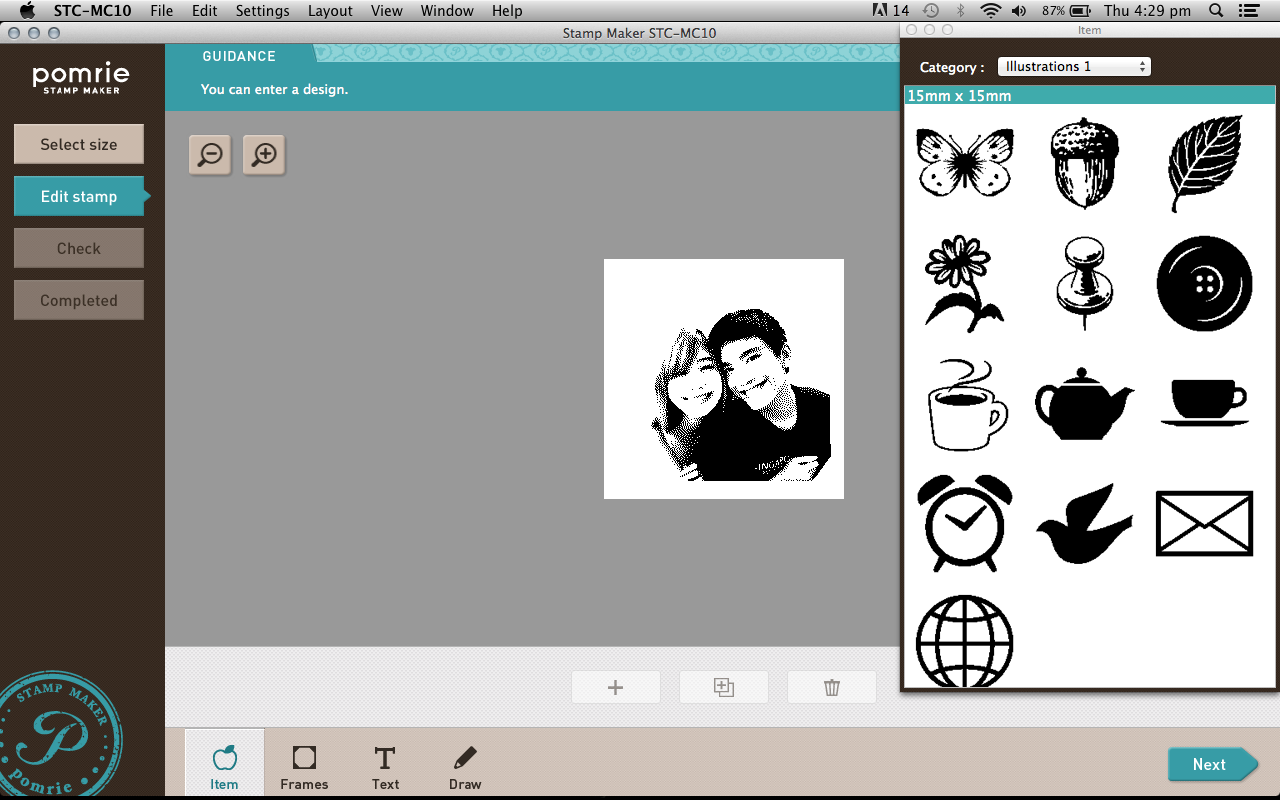
After the design is finalise, you can edit your stamp and add in their stock images! They have a lot to chose from. You can even add in frames!
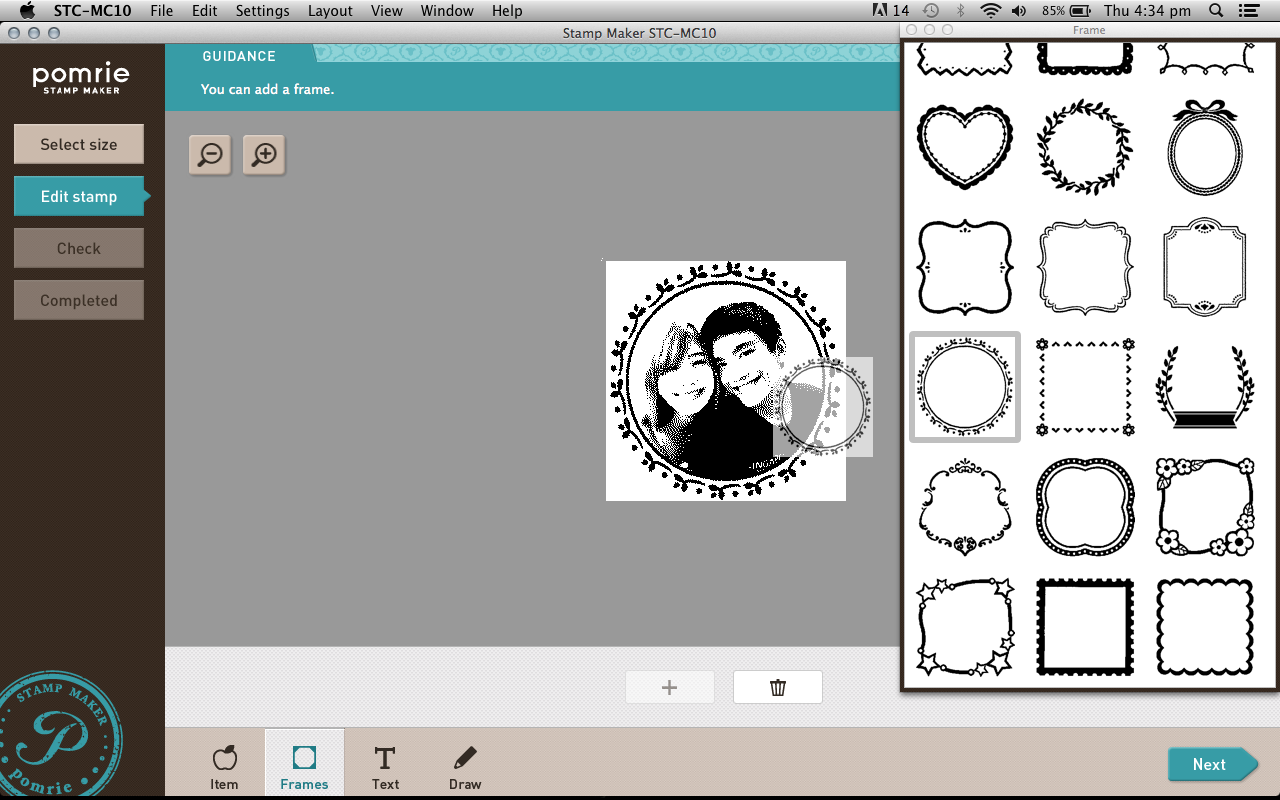
Just drag and drop! So simple right?!!
You can even add text, or draw anything you want to add on!
It works like a Purikura(NeoPrint). Just stamp stamp stamp away~~~~
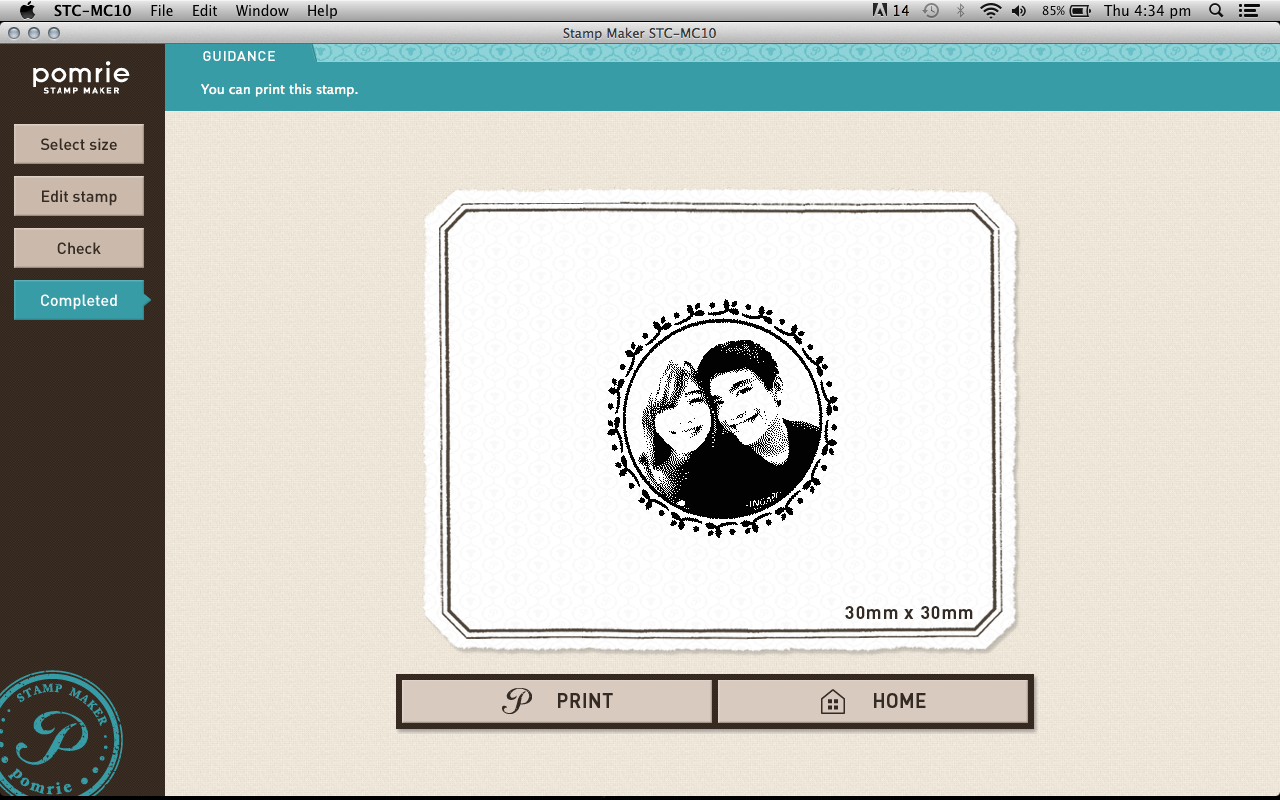
TADAH! All done! All you have to do now is connect the Pomrie Printer to your computer using the USB cable provided, and click print!
Super easy right.... X'D Even my mom knows how to use it.

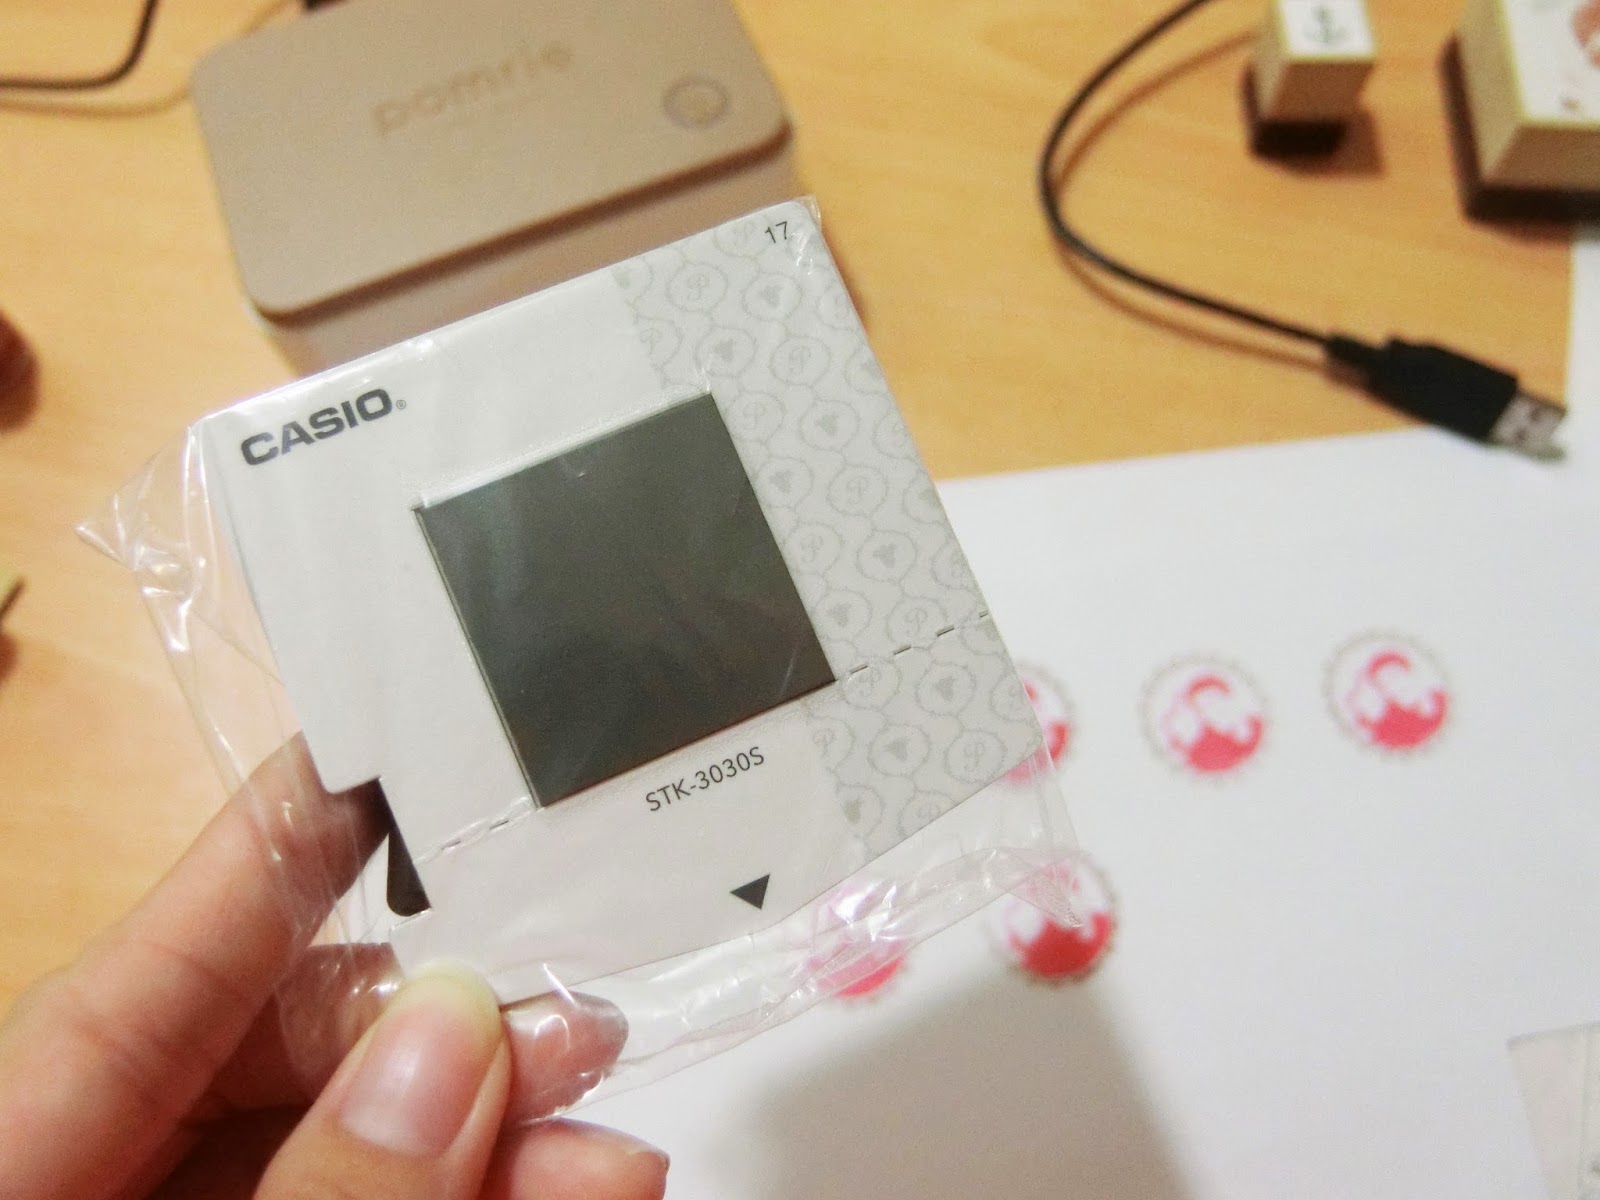
Slip in the printing sheet!!
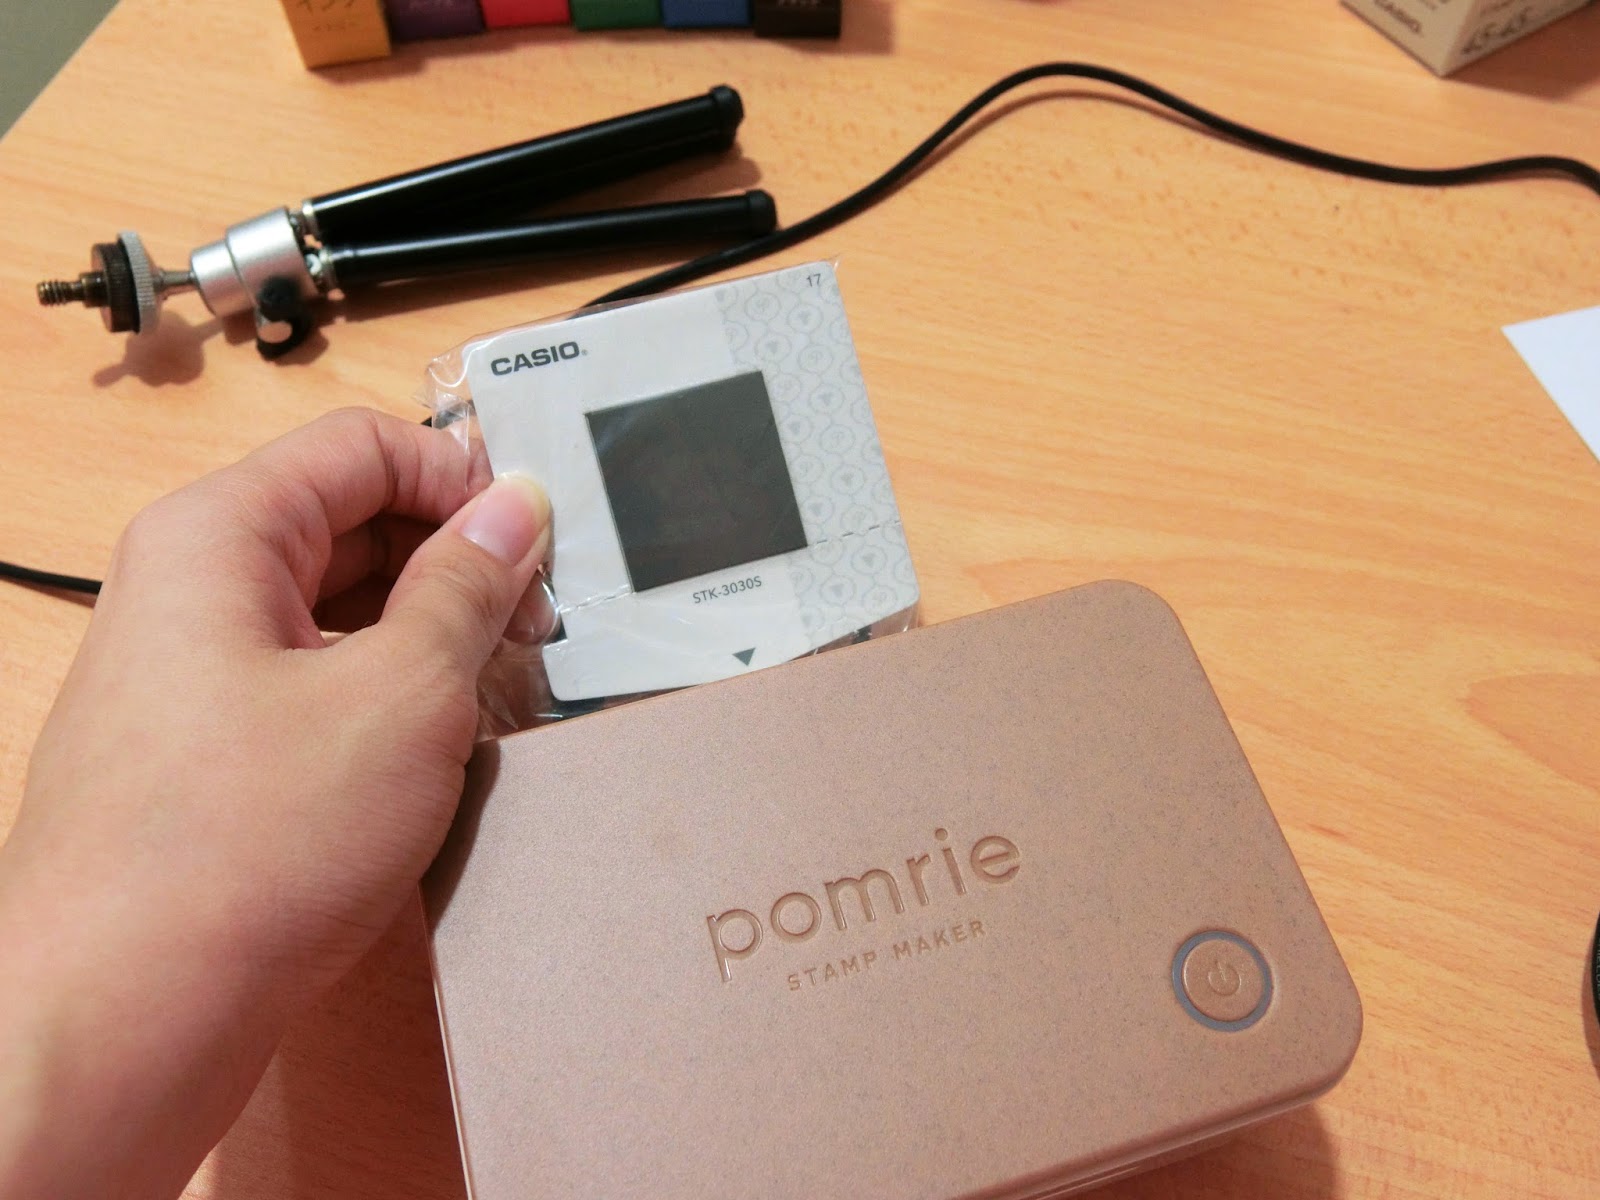
But of course remove the packaging la..... I didn't managed to photograph my other stamp, so this is a stand in to show you guys how it works, XD
But don't remove the rubber from the card before it's printed!!
You are supposed to slot the entire thing in, and then peel off the cardboard after the printing is done!
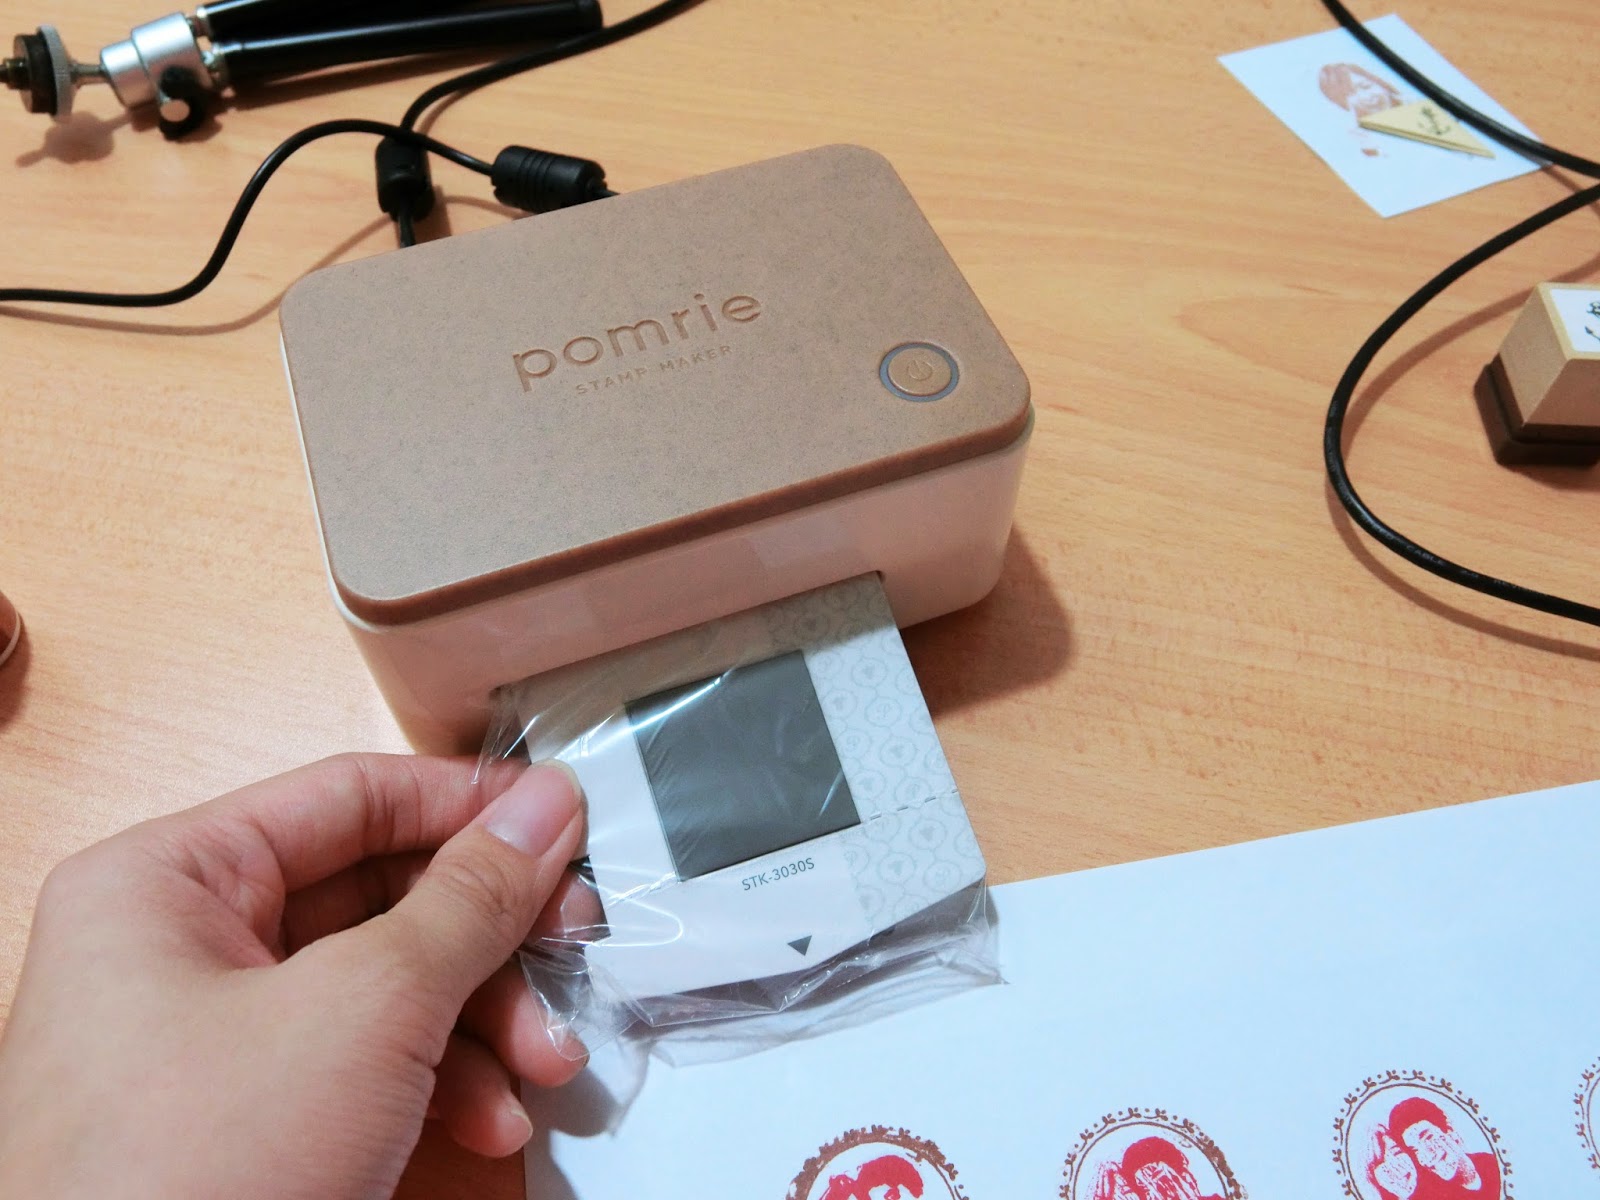
And then after it's done .... it poops the sheet out from the front. x)
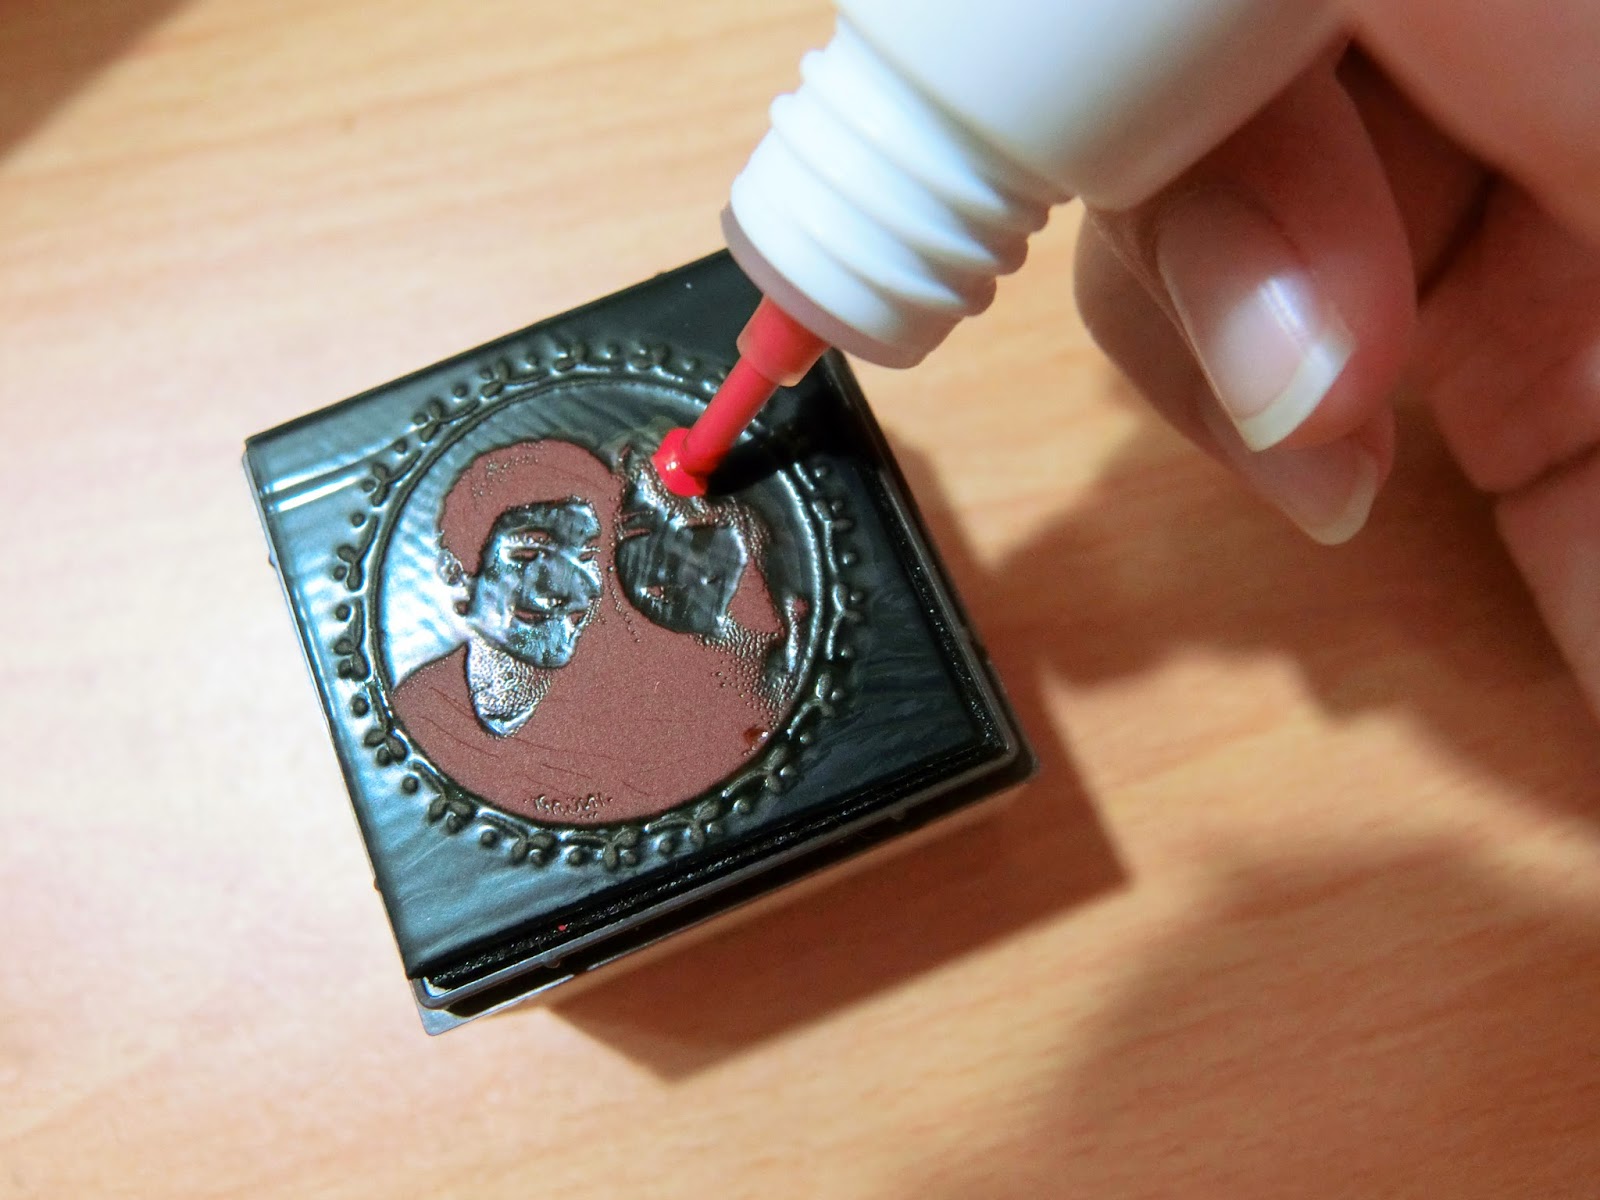
After that just fill in the colour with the inks!!
Fill, fill, fill......
Once you are done filling in the colours, leave it for about 5 minutes to let the ink absorb into the thermal pad. Once fully absorbed, you can start stamping your stamp already!
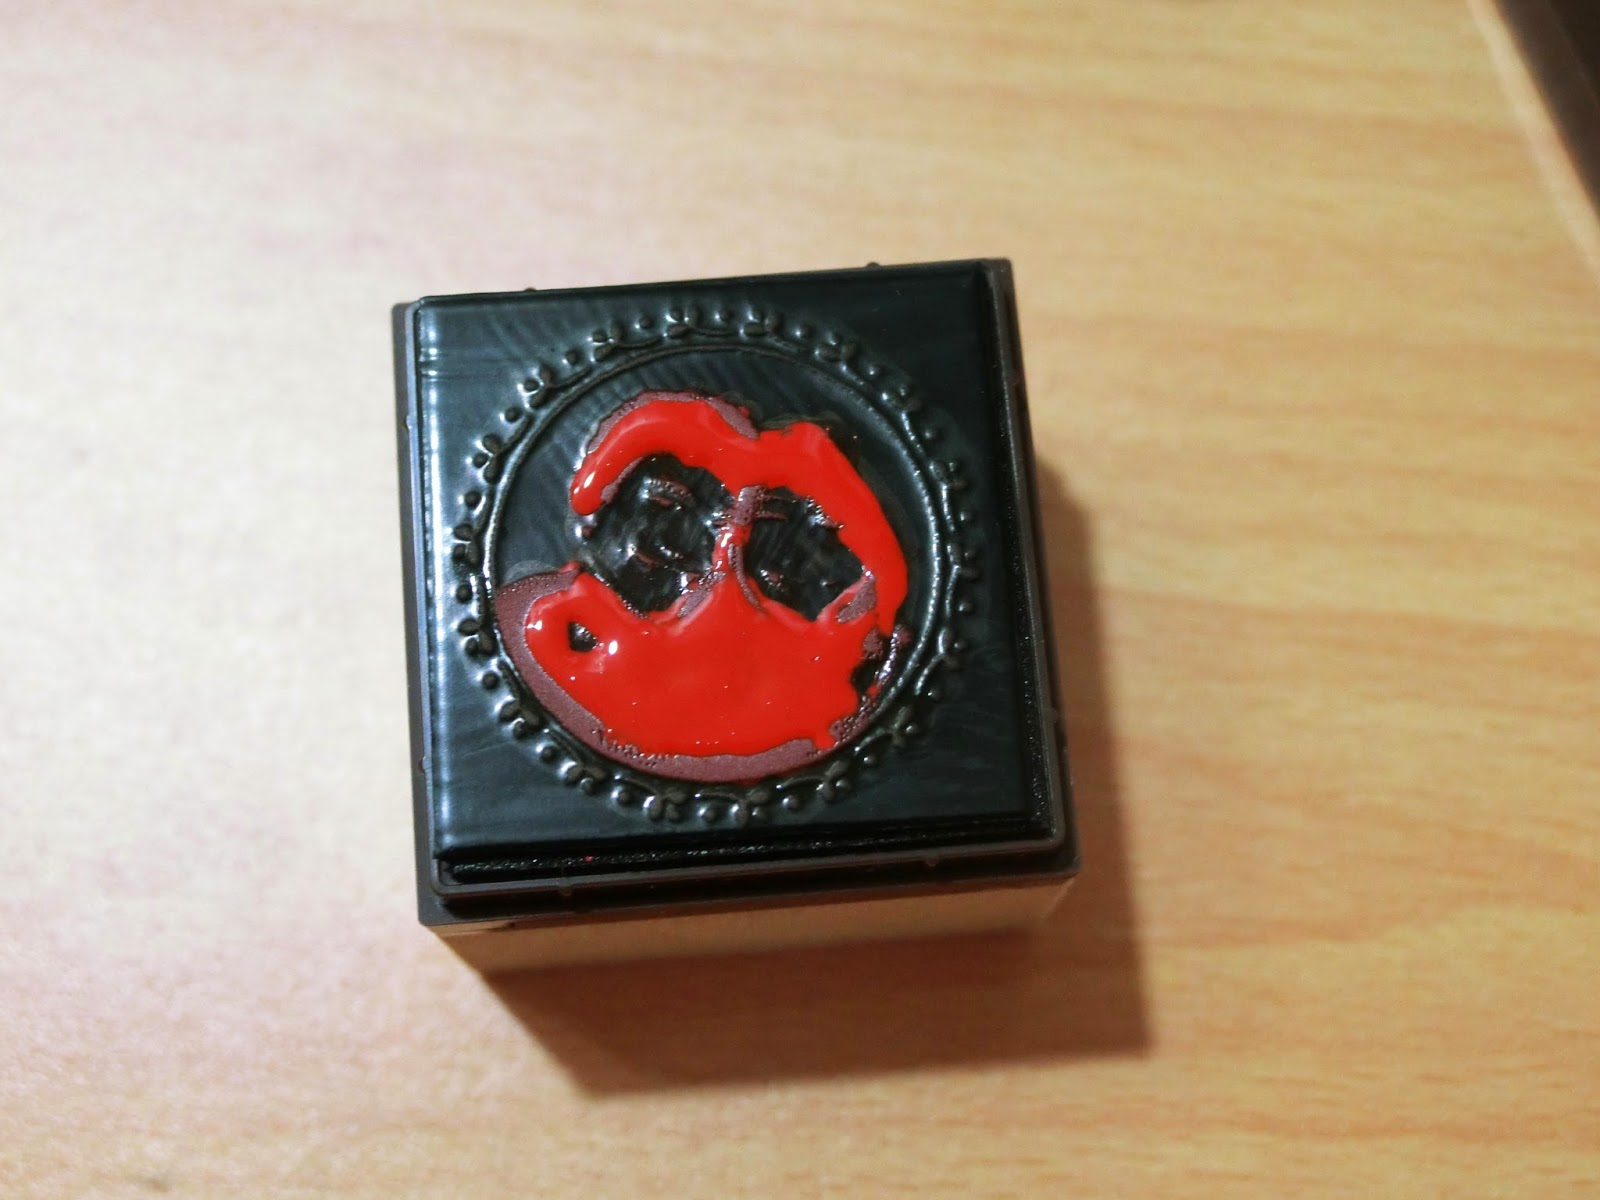
"Chop" a few times first to get rid of the excess ink!
Once you think it's ready, you can stamp your sticker label for your stamp!
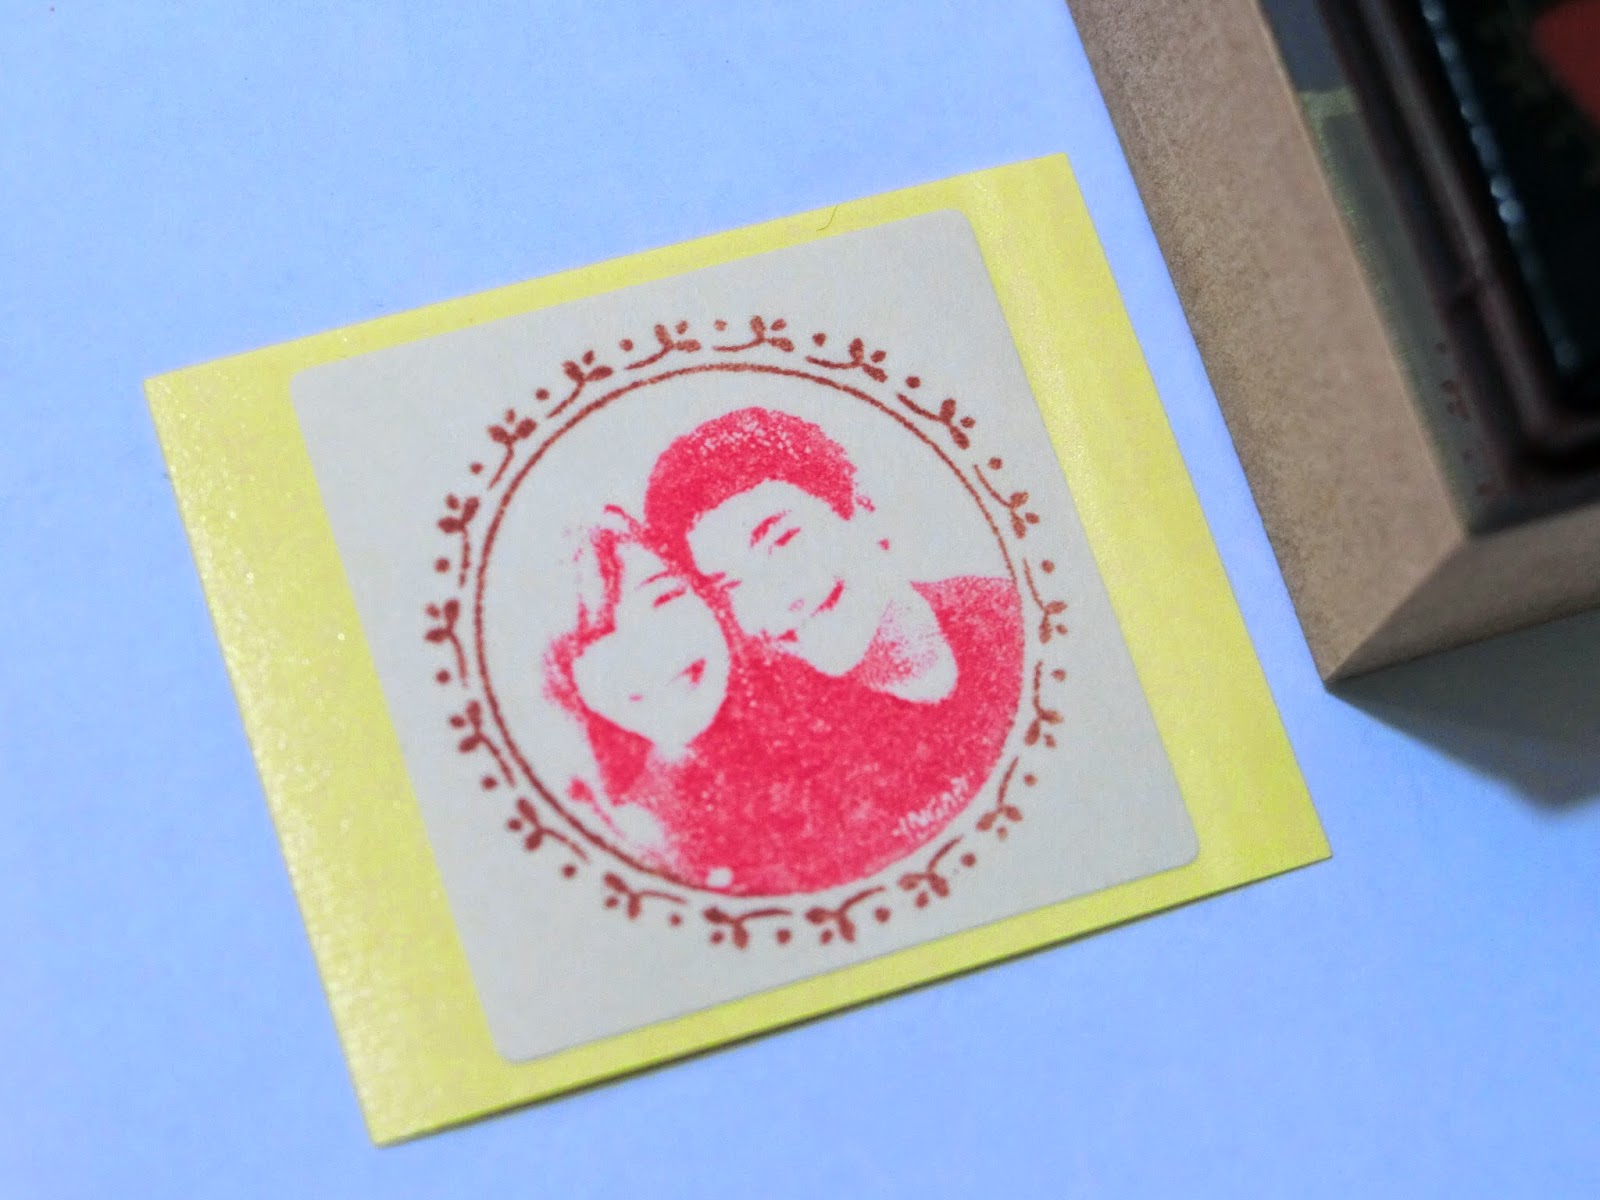
Perfect. x)
Now stick it to the top of the wooden block, and you're all done!!
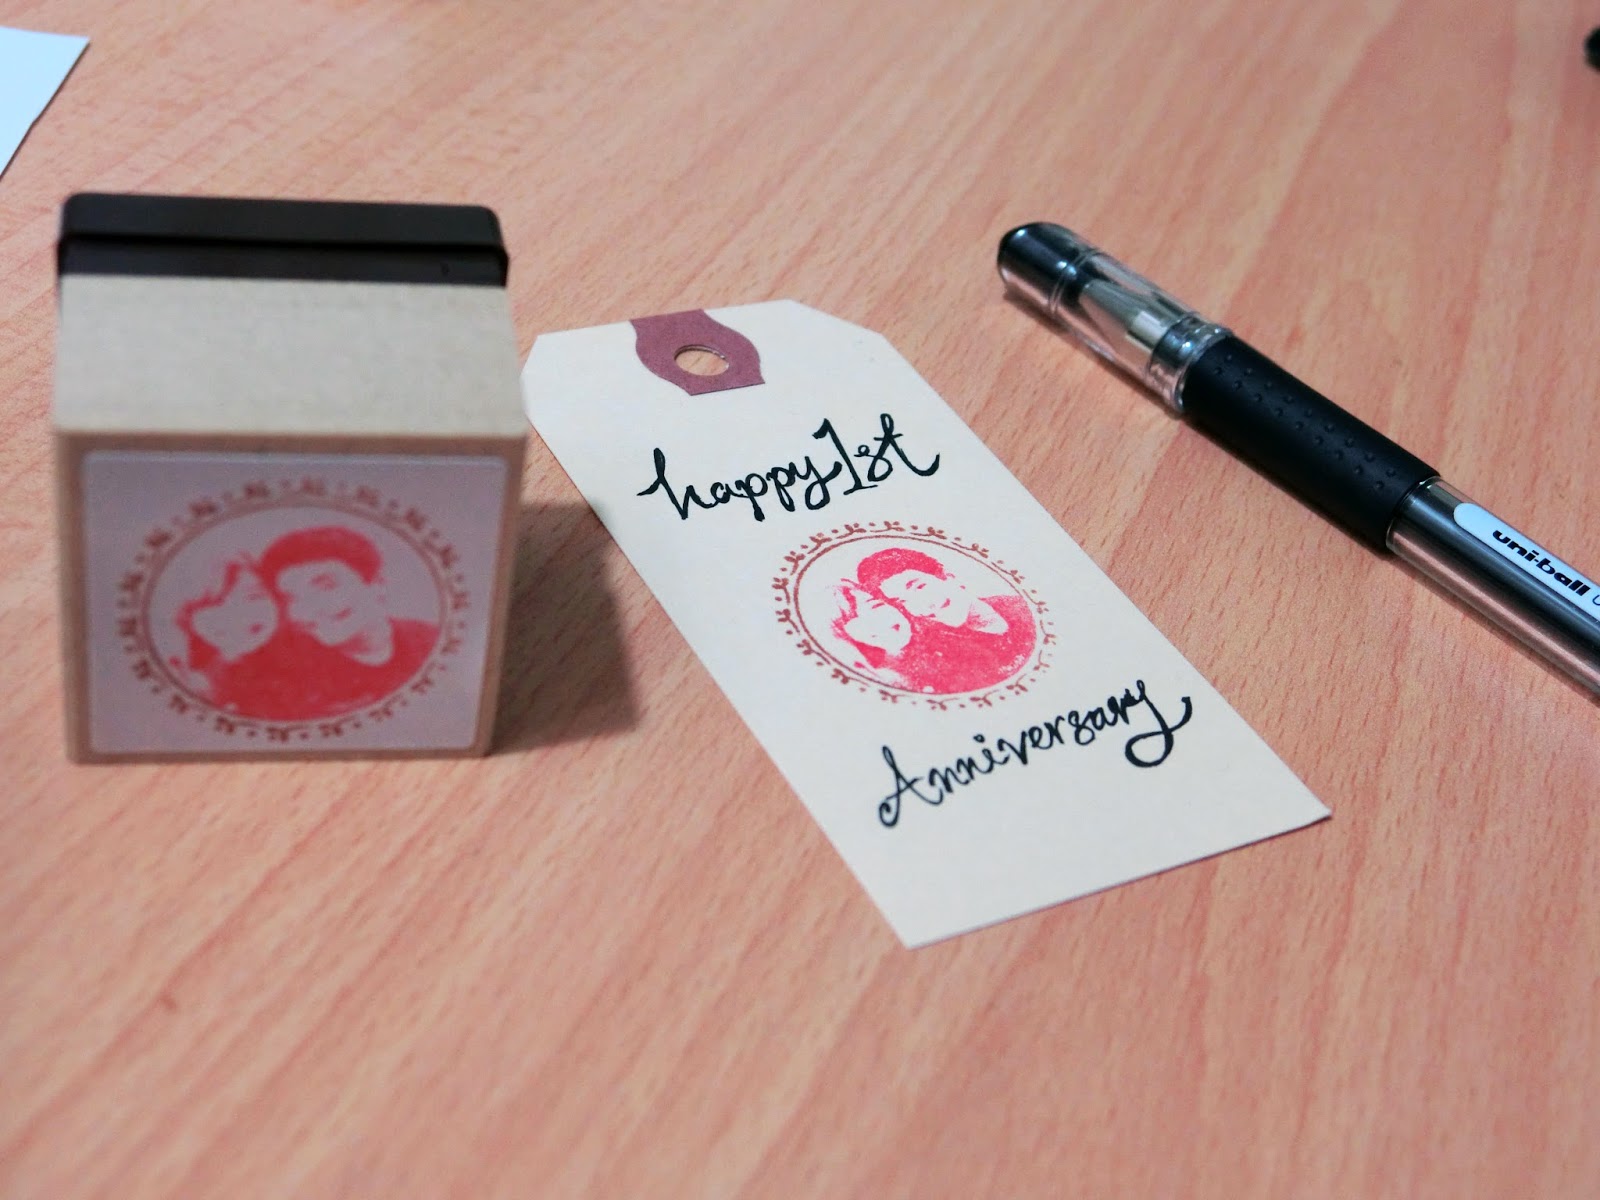
:D
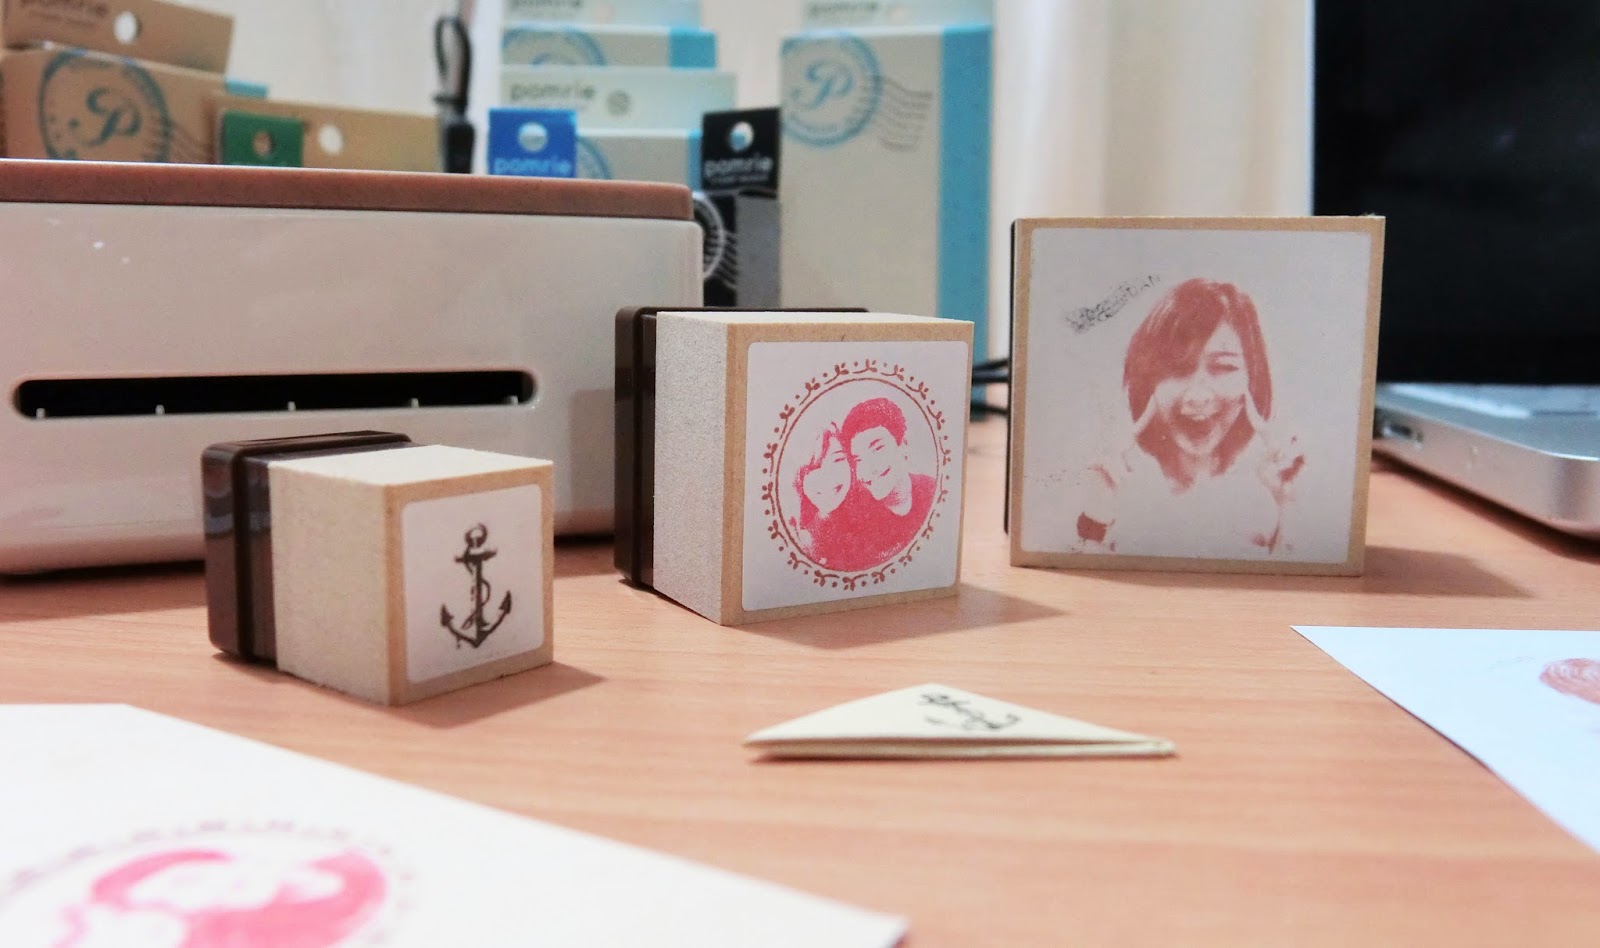
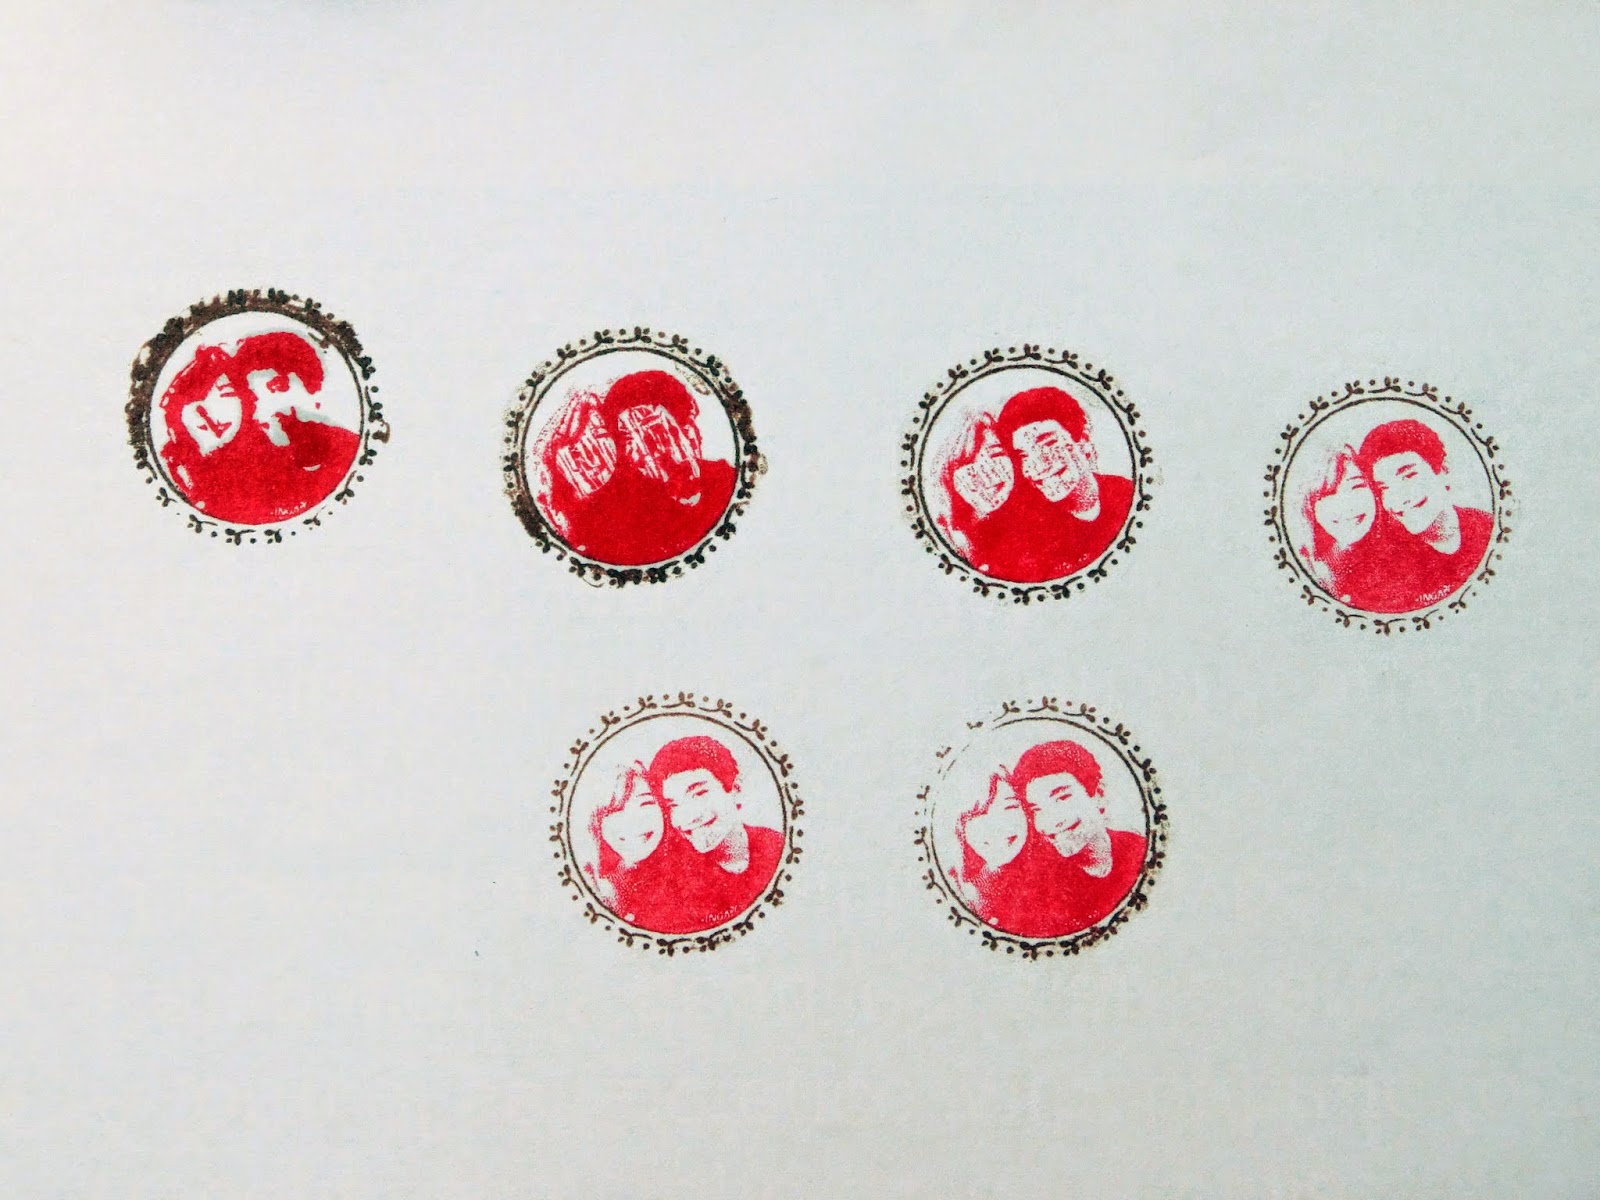
Here are the few stamps I currently have!! I got myself that selfie stamp on the right during the last IT show back in September, hahahaha. Then I made myself my favourite anchor and a photo stamp for Ryan! Quite obsessed I know. I just have to include my face instead of just his'. LOL :x
This is super addictive la. I want to print so many stamps but I need to resist so I can make sure I don't anyhow misuse it.
Anyway, Christmas is coming!! Guys, you know what to do uh. :P I believe most girls would want this soooooo bad!
After you've chose your image, you will need to chose the size of the stamp you will be using.
15mm X 15mm is basically a thumb-size stamp, hahaha. It's too small to fit both me and Ryan's faces in. XD
So I got the 30mm X 30mm! Don't forget to resize your image to fit! Otherwise your image will kena crop!
You can resize by clicking the "+, -" signs beside the drop down list!
Next, highlight the area that you don't need.
It will then remove your selected area and bring you to the "Revise" page!
Over here, you can do some clean up and remove any remaining excess areas.
Once you've confirmed the design, you can move on to choosing the effects! They have so many effects I'm totally spoilt for choice!
I like the "Realistic" effect because it looks the most realistic. (Hmm... You don't say?)
Then you'll just need to adjust the levels of your effects and borders if you want to!
Oh, oh, don't worry if you don't like the effect you chose. You can always click the side bar to go back the step you want to.
After the design is finalise, you can edit your stamp and add in their stock images! They have a lot to chose from. You can even add in frames!
Just drag and drop! So simple right?!!
You can even add text, or draw anything you want to add on!
It works like a Purikura(NeoPrint). Just stamp stamp stamp away~~~~
TADAH! All done! All you have to do now is connect the Pomrie Printer to your computer using the USB cable provided, and click print!
Super easy right.... X'D Even my mom knows how to use it.
Slip in the printing sheet!!
But of course remove the packaging la..... I didn't managed to photograph my other stamp, so this is a stand in to show you guys how it works, XD
But don't remove the rubber from the card before it's printed!!
You are supposed to slot the entire thing in, and then peel off the cardboard after the printing is done!
And then after it's done .... it poops the sheet out from the front. x)
After that just fill in the colour with the inks!!
Fill, fill, fill......
Once you are done filling in the colours, leave it for about 5 minutes to let the ink absorb into the thermal pad. Once fully absorbed, you can start stamping your stamp already!
"Chop" a few times first to get rid of the excess ink!
Once you think it's ready, you can stamp your sticker label for your stamp!
Perfect. x)
Now stick it to the top of the wooden block, and you're all done!!
:D
Here are the few stamps I currently have!! I got myself that selfie stamp on the right during the last IT show back in September, hahahaha. Then I made myself my favourite anchor and a photo stamp for Ryan! Quite obsessed I know. I just have to include my face instead of just his'. LOL :x
This is super addictive la. I want to print so many stamps but I need to resist so I can make sure I don't anyhow misuse it.
Anyway, Christmas is coming!! Guys, you know what to do uh. :P I believe most girls would want this soooooo bad!
You can now get your hands on the CASIO Pomrie at Popular Book Fest, From 12th Dec - 21st Dec 2014, at Suntec Expo hall!
There will also be an exciting promotion for Pomrie at the Book Fest!
The Pomrie machine will be sold at a special price of $99.00 and customers can enjoy 20% off Pomrie accessories purchase!!
Upon getting your Pomrie, don't forget to participate in their FREEBIE GIVEAWAY too!
Simply create your stamps and post 4 craft designs made by your Pomrie set on your Facebook! LIKE and tag Casio Pomrie Singapore by 31st January 2015 and receive a FREE piece each of 30x30 and 45x45 stamp replacement sheet holder kit!
What chu waiting forrrrrr?
The CASIO Pomrie is also sold at these 4 Popular flagship store:
BRAS BASAH COMPLEX - POP@Central
Blk 231 Bain Street #04-23/33 Bras Basah Complex S(180231)
Tel : (65) 6339 0772
Fax : (65) 6339 2103
Email : popcentral@popularworld.com
Business Hours
Mon - Thu : 10.00am - 07.00pm
Fri - Sun & PH : 10.00am - 09.00pm
MARINE PARADE CENTRAL
Blk 86 Marine Parade Central #02-101/102 S(440086)
Tel : (65) 6344 9884
Fax : (65) 6345 0831
Email : popmp@popularworld.com
Business Hours
Mon - Fri : 11.00am - 09.00pm
Sat, Sun & PH : 10.00am - 09.30pm
JURONG POINT
1 Jurong West Central 2 #B1-41 Jurong Point Shopping Centre S(648886)
Tel : (65) 6793 5280
Fax : (65) 6793 5284
Email : popjp@popularworld.com
Business Hours
Mon - Sun : 10.00am - 10.00pm
TOA PAYOH HDB HU
530 Toa Payoh Lor 6 #02-01 S(310530)
Tel : (65) 6358 1709
Fax : (65) 6352 7157
Email : pop2tp@popularworld.com
Business Hours
Mon - Fri : 10.30am - 09.00pm
Sat, Sun & PH : 10.00am - 09.30pm


3 comments
Hi Vivian, thanks for posting this review! I'm just wondering if regular stamp pads work for these (I have a bunch of those!)? Or only the inks from Casio can be used? Thanks in advance! :)
ReplyDeletePauline
Hello Pauline!
ReplyDeleteNope, I don't think those would work! Because the stamp is actually a cushion, unlike your usual rubber stamps that protrudes from the "board" itself. The printed area will absorb the ink! So you just apply the ink on the areas you want, and then stamp it all over hahaha.
Using regular stamp pads might end up smudging the entire art piece!
Hope this helps :D
Your info is really amazing with impressive content. Excellent blog with an informative concept.
ReplyDeleteRubber Stamp Maker
Any questions, you can always mail to: veeviisme@live.com :D